
How to Make Your Own Textures for Photoshop with Photographs: A Beginner's Guide with Free Textures
I have been using textures for in my photography and design work so long, I wasn’t even thinking about it until recently a friend mentioned she was lacking some oomph for a brand she was designing. I immediately offered up some of my go-to textures and marks.
If you want to skip to the end and download the freebie — or the result of this tutorial go here.
If you want to create something unique to you and your brand follow along. Creating your own textures for Photoshop can add a personal touch to your designs and make them stand out. Whether you're a beginner or an experienced designer, this guide will provide you with step-by-step instructions on how to make textures for Photoshop.


Plan Your Texture Creation and Photoshoot.
Before you start creating your textures, you'll need to consider the final result you hope to achieve. A little bit of planning can go a long way. When considering the type of texture you want to create you want to make a possible list of materials you need or locations to visit. Are you hoping for geometric or grungy? Organic or man-made? You want to plan for materials and tools that would be best suited for achieving that look. For example, if you wanted to create geometric and grid textures, you may want to pick up grid paper or visit a location with strong geometric architecture. If you want to create a fabric texture, you'll need fabric and a camera to take a high-quality photo of the fabric.


For this tutorial, I focused on using found organic textures that I photographed myself. One reason I enjoy this approach is that I don't need to worry about collecting materials, and it's a fun exercise to go texture hunting. I spent a lot of time in nature and on walks, so bringing my camera along is a habit I have.
Create or Find Your Texture.
Once you have decided what you want to create or find, it’s time to either head out or make the marks you need. Keep in mind there are many different techniques you can use to create textures, such as painting, drawing, photographing, or scanning. Experiment with different techniques to find what works best for you and the type of texture you want to create.
Remember to keep in mind the size and resolution of your texture, as well as the file format you want to save it in for use in Photoshop.
For this guide, I went out and snapped photos on the beach to create a texture that felt special to the area I live in and I could apply to photos and design work. I knew I wanted organic feeling textures but went with an open mind, the goal being to look for variety.
Once we arrived at the beach, I realized that I could easily produce three or four texture themes, such as water, sand, rock, and seaweed.
For a more gritty or non-organic texture, you can take photos of concrete, bricks, or anything with fine details. You don't need a high-resolution camera, but if you have access to one, I recommend using it. A larger final product will allow for maximum use in your work.
You can also experiment with black paint. Apply it to paper, rough it up, crumple it, or even stomp on it! Give yourself permission to play with it and see what unique textures you can create.
Scan or Photograph Your Texture.
If you end up with paper, or found objects, you can also scan them. This can include anything from a piece of fabric to a piece of wood. You can collect leaves, or papers you find interesting.
If you are using a scanner, adjust the settings to get the best resolution and colour accuracy. If you are using a camera, experiment with different angles and lighting setups to get the best shot. Once you have your image, you can import it into Photoshop and start editing and manipulating it to create your desired texture.
I am going to state very clearly, there almost isn’t a wrong way to go about this. There are many methods and some photographers will use coloured photo textures, others will use greyscale, and then some will want a darker almost black image to use, while I personally prefer softer greys and use texture as a soft addition to my work.
So I encourage you to play around with all the options eventually and find your own style you like to create and work with.
Once you start creating custom textures you will see them all around you — the best bet is to have some fun collecting them!
Edit Your Texture in Photoshop.

Once you have your texture image imported into Photoshop, it’s time to start editing and manipulating it to create your desired texture.
💡 If you import raw images into Photoshop, start by doing colour editing in Camera Raw. If you prefer Lightroom, edit the images there before transferring them to Photoshop. Ultimately, you will likely want to use Photoshop to bring out textures in the images.
This can include adjusting the colour, contrast, and brightness, as well as adding filters and effects. You can also use tools like the Clone Stamp and Healing Brush to remove any unwanted elements from the texture. Experiment with different techniques and tools to create a unique and customized texture that you can use in your design projects.
Things to try:
Desaturate - I personally rarely use colour textures, and I like to work with grey or black and white textures. If I want the texture to match the photo and play with colour, I will add a hue adjustment layer.
Invert - It will make a big difference in how the texture shows up. So you can easily have one texture that impacts your photo or design very differently.
Levels - This can help you define the edges of your texture
Masking - When applying your texture, remember you can select your object or play with masks to decide the final result
Healing Brush & Cloning Stamp - If there are areas that are distracting you can remove them or add extras
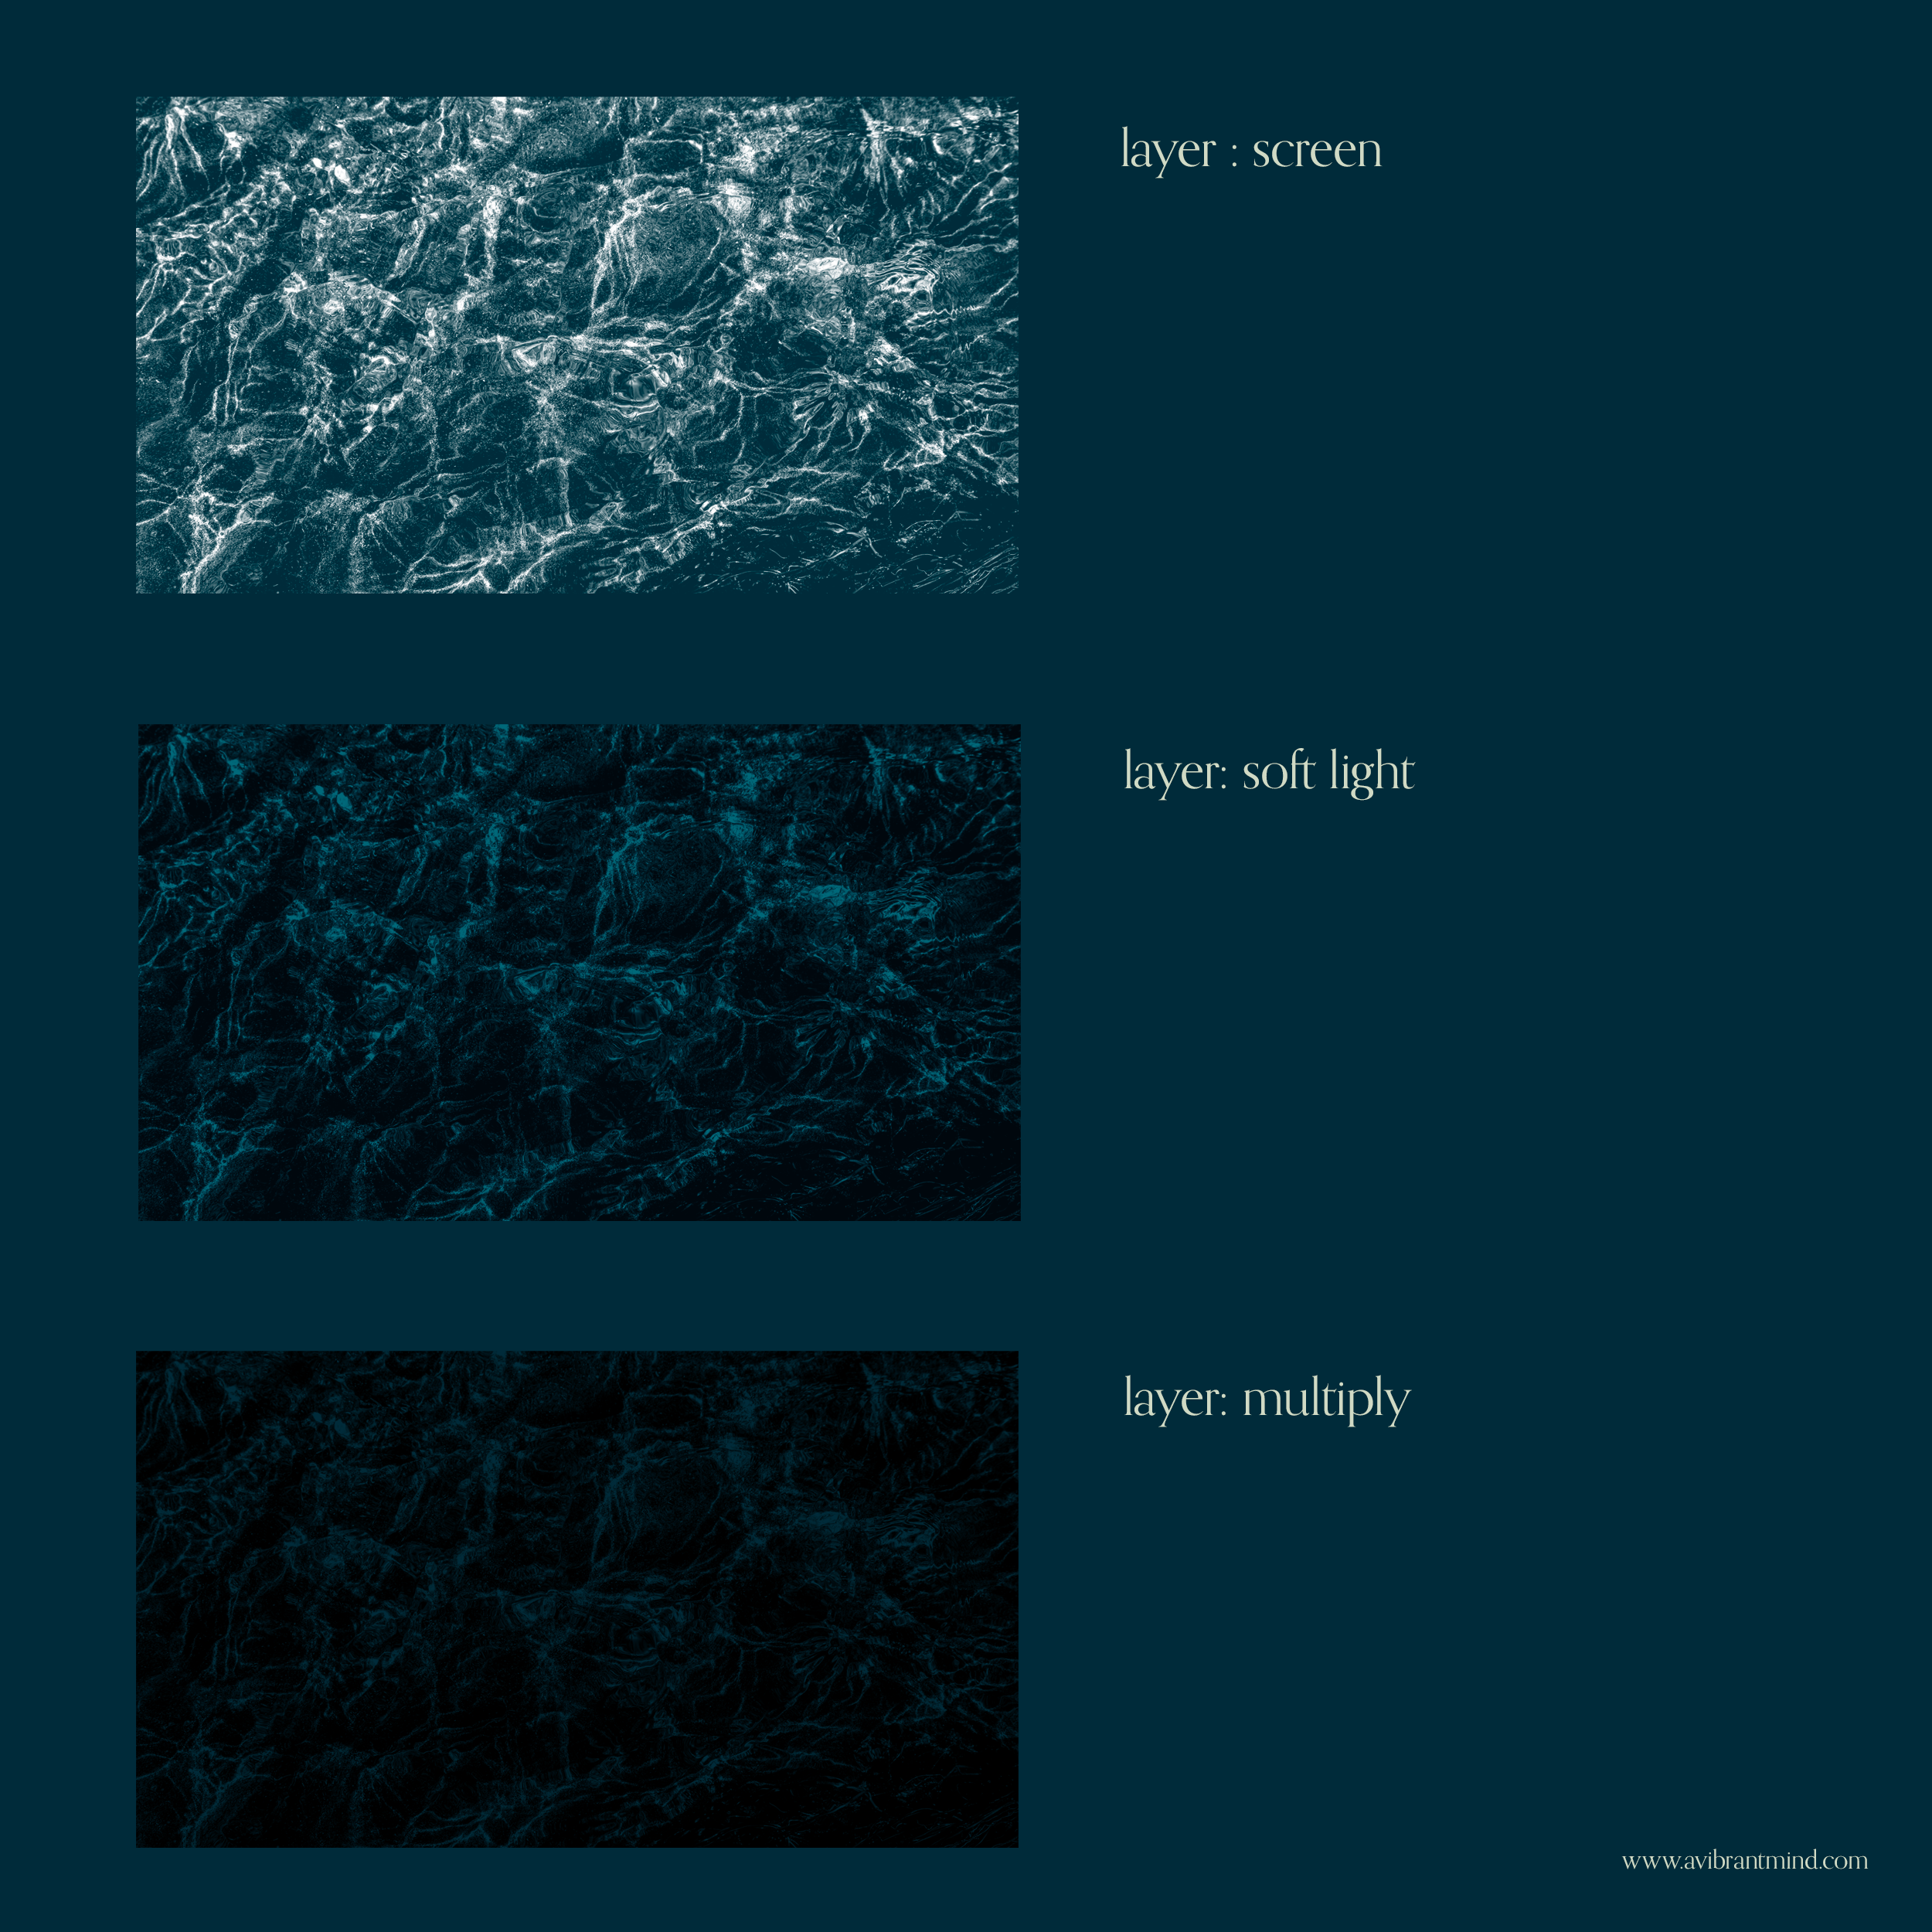
When playing and experimenting, keep in mind that how you layer the final texture will impact the final result. I typically use one of three layer styles depending on the look I want to achieve: multiply, soft light, or screen.
You can adjust the opacity of the texture or even break it up further. Don't be afraid to manipulate textures by adding more noise or trying new layer styles.
Save and Use Your Texture.
Once you have created your desired texture, it’s time to save it and use it in your design or photography projects. I generally save my textures as png files, especially if there is any area that has transparency. PNGs are also smaller files and better for the web.
💡 From Adobe: Both PNGs and TIFFs are excellent choices for displaying complex images. But PNGs tend to be smaller in size, so are potentially better suited for websites. TIFFs, on the other hand, are often the best choice for professional use, scanning, and print options.
To save your texture, go to File > Save As and choose a file format that supports transparency, such as PNG or TIFF. Make sure to save your texture with a transparent background so that it can be easily layered onto other images. To use your texture in Photoshop, simply open the image you want to apply the texture to and drag and drop the texture onto the image. You can then adjust the opacity and blending mode of the texture layer to achieve the desired effect.

